
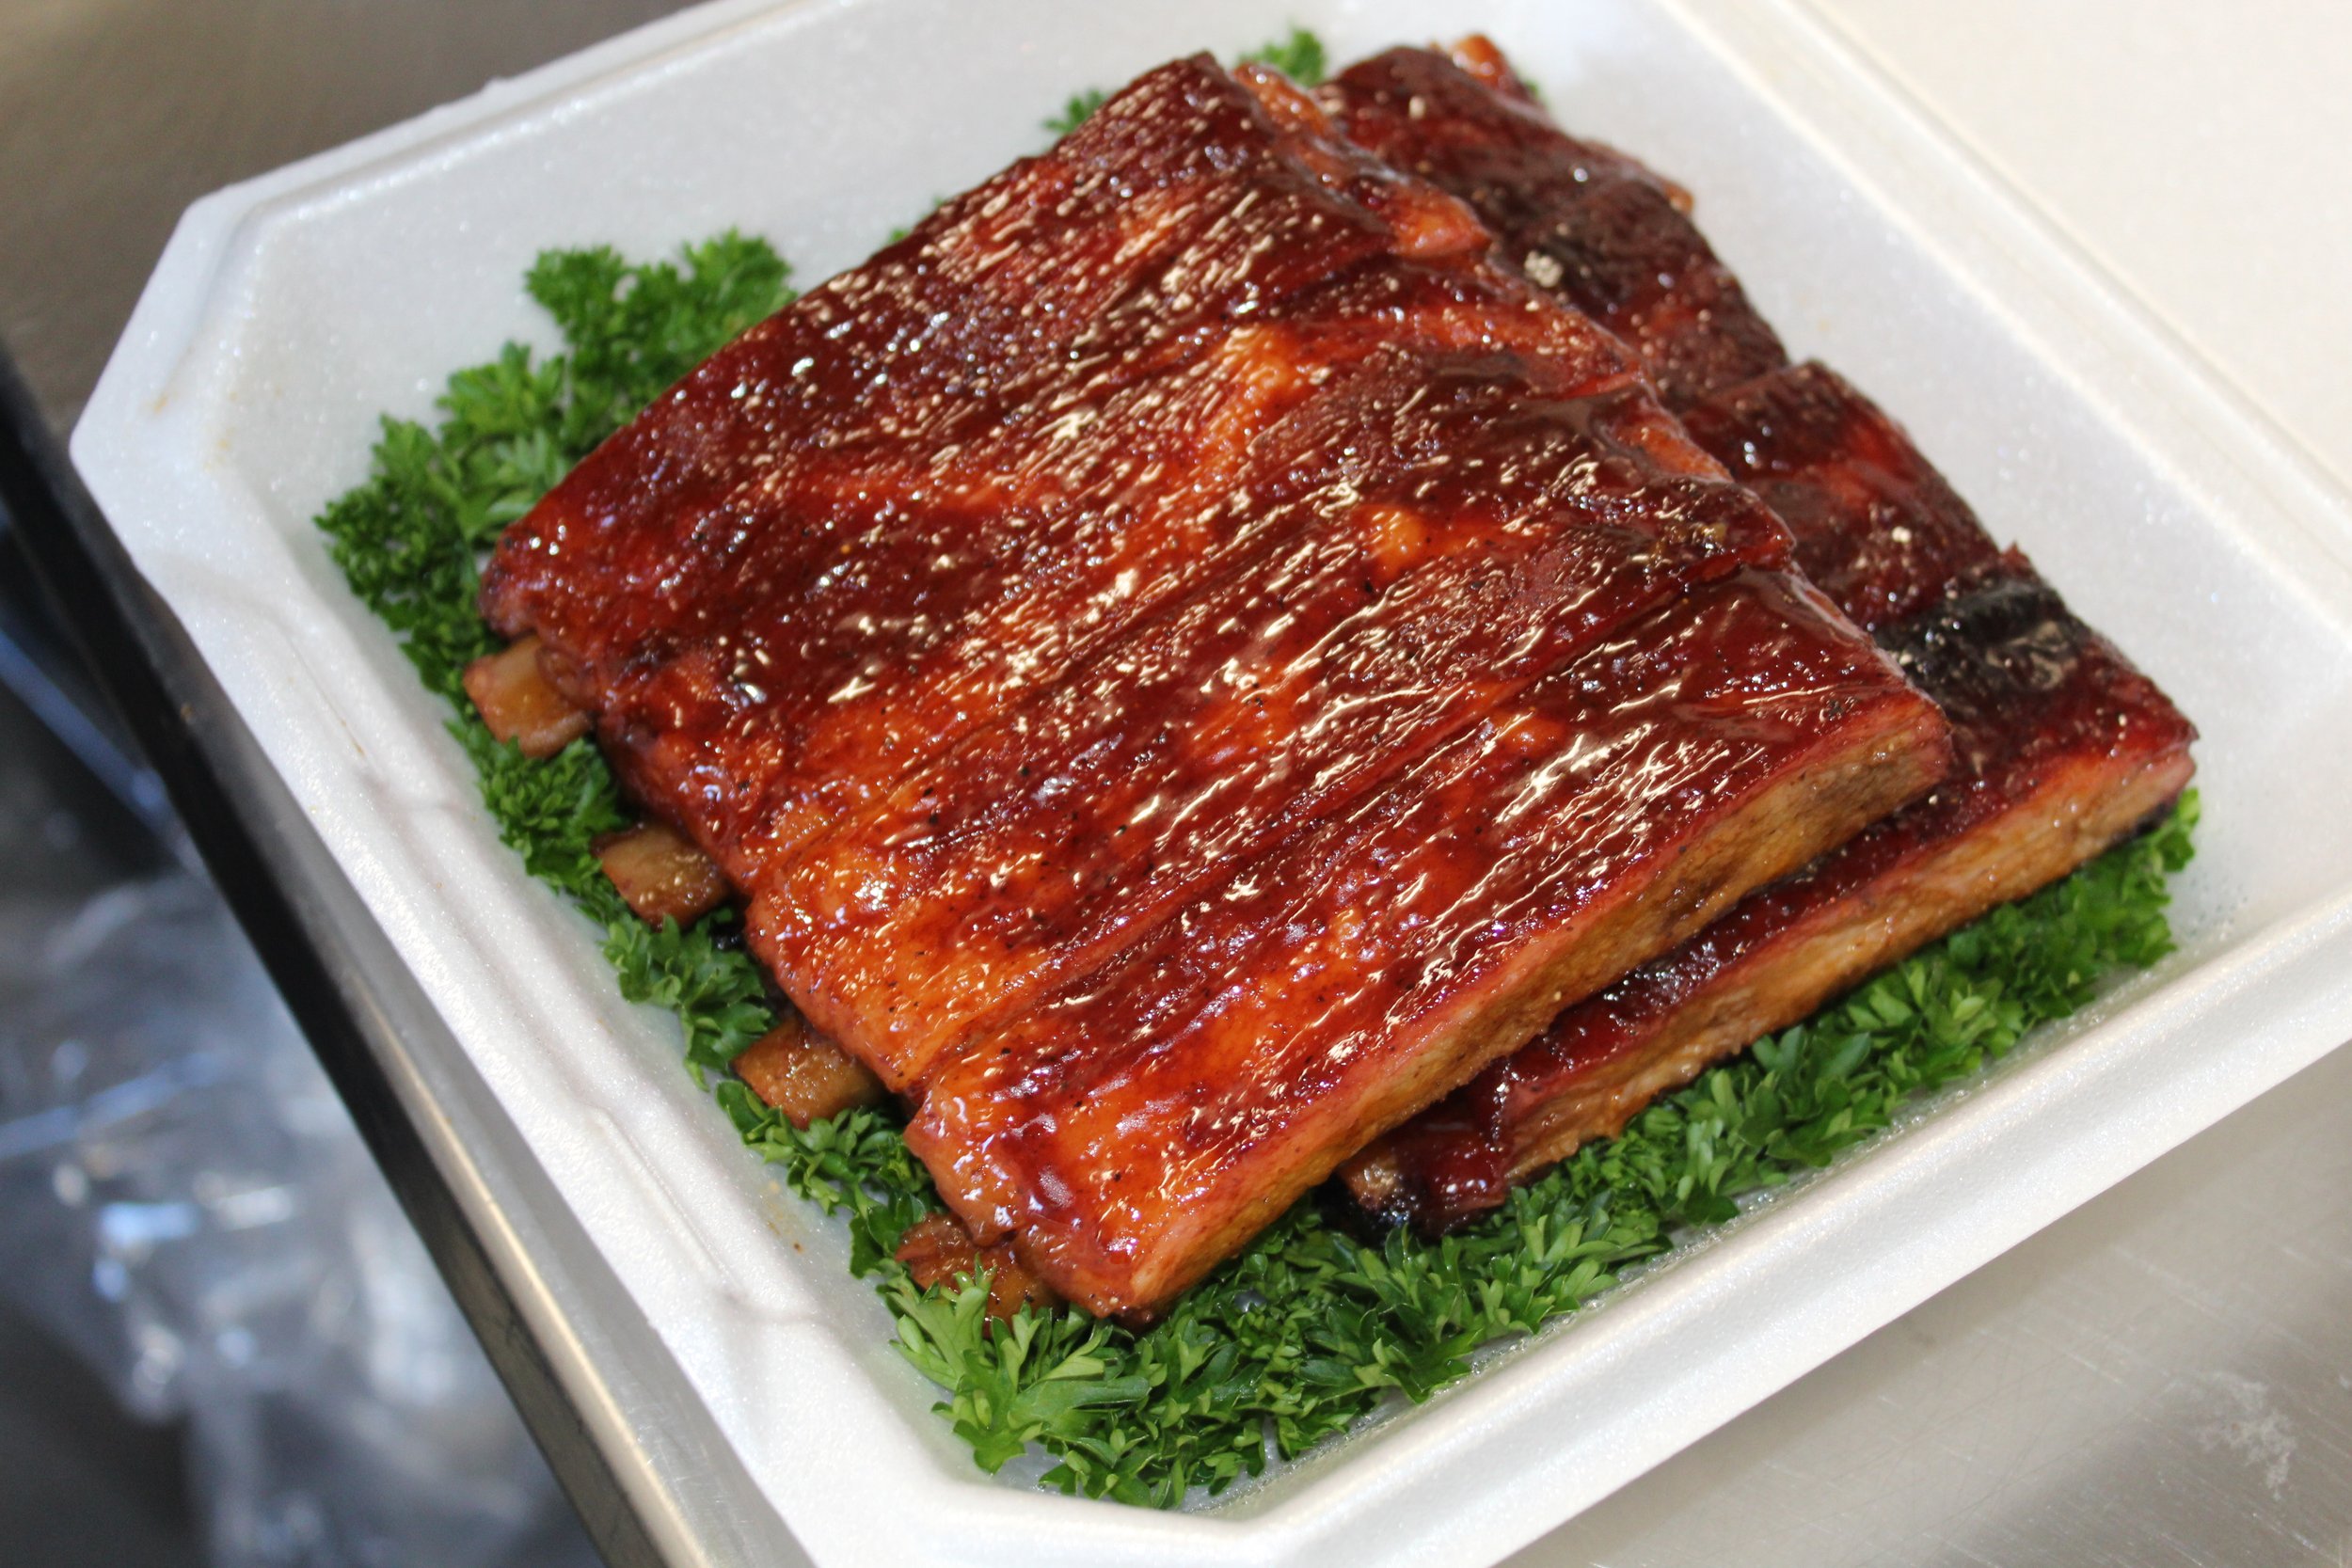
Championship pork spare ribs
Ingredients
1 rack of St. Louis cut ribs or baby back ribs
1/3 cup brown sugar
Honey
1 stick of unsalted butter (preferably Kerrygold)
Your preferred BBQ rub or pork rub (I recommend Your Behind BBQ Chipotle Mango Rub)
Optional binder (flavored oils like grape seed or garlic oil can be used)
Heavy-duty aluminum foil
Instructions:
Start by preparing the ribs:
Remove the ribs from their packaging and pat them dry with paper towels.
Trim any excess hanging meat and large chunks of fat. Remember, a little fat is good for flavor, so don't overdo it.
Carefully remove the membrane from the back of the ribs using a butter knife and a paper towel for a better grip.
If you choose to use a binder, apply it to the ribs evenly. Otherwise, you can skip this step.
Season the backside of the ribs with your favorite pork rub. Consider using two or three different rubs to layer flavors. Apply the rubs lightly, allowing them to sit on the ribs for about 30 minutes until they appear "wet."
Preheat your smoker to 300 degrees Fahrenheit during this time.
After 30 minutes, flip the ribs over and season the top side with the same rub combination. Allow the rubs to sit on the top side for another 30 minutes.
Once the smoker is ready, place the ribs on the grates, bone side down, and maintain the temperature at 300 degrees Fahrenheit.
After about an hour and a half, perform the "tap test" by tapping the ribs with your finger. If the rub comes off on your finger, continue cooking for another 30 minutes until it doesn't.
Once the tap test is successful, it's time to wrap the ribs:
Lay out two sheets of heavy-duty aluminum foil.
Add 3 ½-inch squares of butter to each foil sheet.
Sprinkle brown sugar evenly over the butter.
Drizzle three lines of honey over the brown sugar.
Place the ribs, meat side down, on top of this mixture.
Repeat the process for the back side of the ribs.
Wrap the ribs snugly in the foil, being careful not to puncture it.
Return the wrapped ribs to the smoker, meat side down, for another hour at 300 degrees Fahrenheit.
After an hour, start checking for tenderness by gently poking the meat. Aim for an internal temperature of around 206 degrees Fahrenheit. However, the feel of tenderness is also an excellent indicator.
Once the ribs are tender, remove them from the smoker and allow them to rest in the foil for 20 minutes before slicing.
Optionally, before serving, apply your favorite BBQ sauce to both sides of the ribs, or return them to the smoker briefly to set the sauce, keeping a close eye to prevent burning due to the sauce's high sugar content.
Serve and enjoy your delicious ribs!
Full Video- https://youtu.be/c4rRW6rF540?si=bMpus_dR-yYYXKMJ
Bacon Wrapped Ribs

Ingredients
1 pack of St. Louis cut ribs
Your favorite rib rub (e.g., Chipotle Mango Rub)
SPG (Salt, Pepper, Garlic)
Cheap, thin bacon (ideal for wrapping)
Your favorite BBQ sauce
Optional binder: Flavored oils (e.g., grape seed, garlic oil) or mustard
Instructions:
Start by preparing the ribs:
Remove the ribs from the packaging and wipe them down with a paper towel.
Trim any excess hanging meat and large chunks of fat. Leave some fat for flavor, but don't go too deep into the meat.
Remove the membrane from the back of the ribs using a butter knife and a paper towel for a better grip.
If you choose to use a binder, apply it evenly to the ribs. However, this is optional.
Season the backside of the ribs with your favorite pork rub. Try using two or three different rubs to layer flavors. Apply the rubs lightly, allowing them to sit for 30 minutes until they look moist.
While the rub is resting on the ribs, preheat your smoker to 300 degrees Fahrenheit.
After 30 minutes, flip the ribs over and season the top side with the same rub combination. Let them rest for another 30 minutes.
Place the seasoned ribs on the smoker grates, bone side down, and maintain a temperature of 300°F (150°C).
After about 1.5 hours, start performing the "tap test" by tapping the ribs with your finger. If the rub doesn't come off on your finger, the ribs are ready. If not, continue cooking for another 30 minutes at a time until it doesn't rub off.
Once the tap test is successful, remove the ribs from the smoker and let them cool for 15 minutes.
After cooling, slice between the bones of each rib. The ribs will still be tough at this point.
Wrap each individual rib with a piece of the thin, cheap bacon, making sure it's wrapped tightly. Place each bacon-wrapped rib on a cutting board.
Season the bacon with your favorite BBQ rub.
Return the individual ribs to the smoker at 300°F (150°C). After 30-45 minutes, check the ribs, focusing on ensuring that the bacon is fully cooked (nobody wants rubbery bacon).
Once the bacon is cooked to your liking, the ribs are done. Apply BBQ sauce to each individual rib.
Serve and enjoy your delicious bacon-wrapped ribs!
Full Video- https://youtu.be/mihHDaeDOAo?si=tcWTeuD60WfFyHve
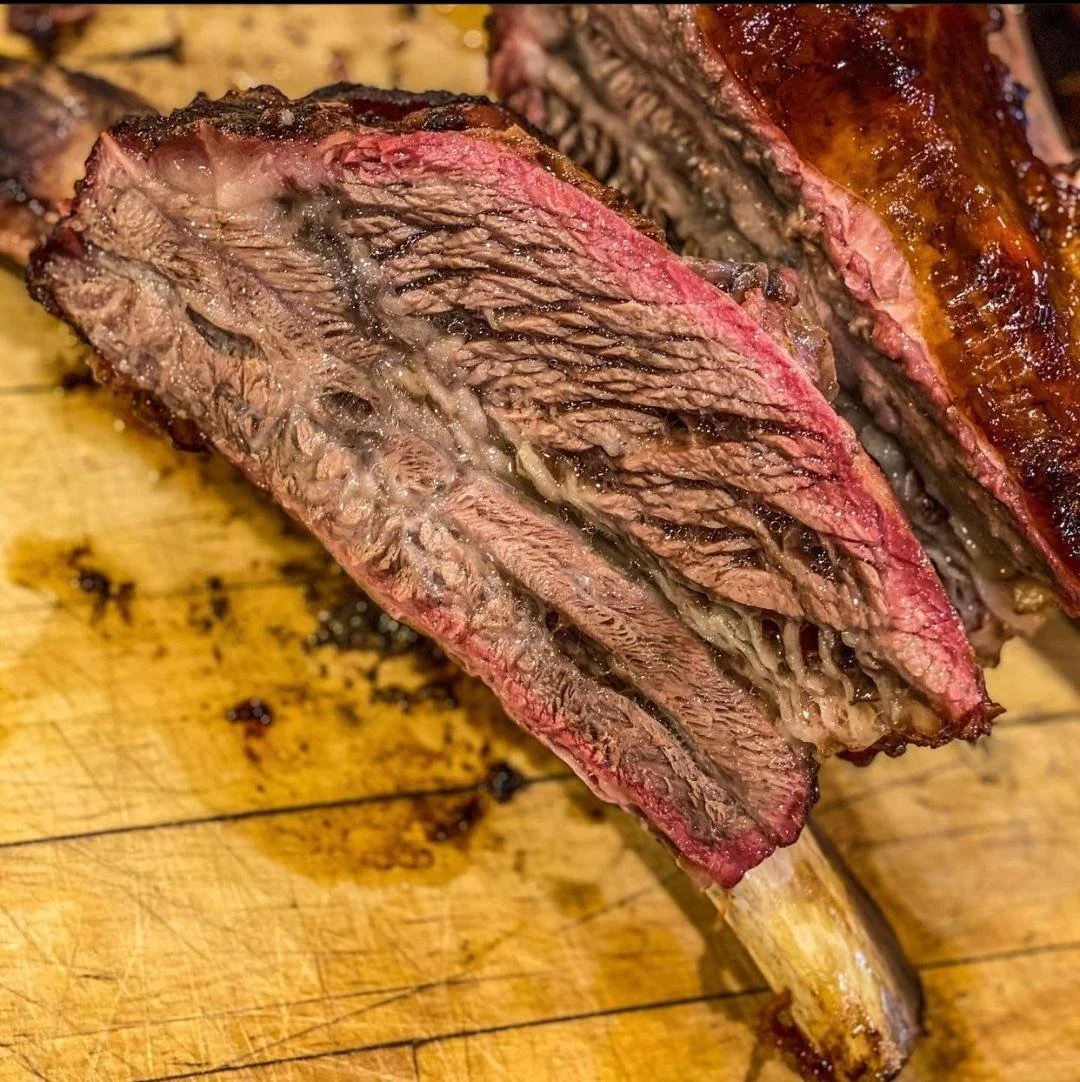
Monster beef ribs
Ingredients:
1 rack of Beef Plate Ribs
Your favorite beef or steak seasoning
1 cup of beef broth
Optionally, consider spraying the ribs with a "I cannot believe it's not butter" spray every 45 minutes to an hour to layer flavors.
Instructions:
Prepare the Ribs:
Take the Beef Plate Ribs out of the packaging and you'll notice a thin layer of fat on top of the meat. Trim away as much of this fat as possible without cutting into the meat. (Dont worry about getting all the fat removed, you want most of it trimmed off)
Leave the Membrane Intact:
Do not remove the membrane from the back of the ribs. The membrane helps hold the meat on the bones and keeps it in place during cooking. Removing it may cause the meat to separate from the bone while cooking.
Season the Ribs:
Apply a medium layer of your preferred beef or steak seasoning to the meat. Allow the ribs to sit and absorb the flavors for 45 minutes on the cutting board.
Preheat the Smoker:
Preheat your smoker to 300 degrees Fahrenheit
Smoke the Ribs:
Place the seasoned ribs in the smoker.
Perform the Tap Test:
After about 3 hours, check on the ribs and perform the "tap test." Gently tap the ribs with your finger. If the rub doesn't easily come off on your finger, it's a sign that the ribs are ready to wrap. the Bark on your ribs is set. If the rub still comes off, continue cooking for an additional 30 minutes at a time until the rub no longer rubs off.
Wrap and Add Beef Broth:
Once the ribs pass the tap test, it's time to wrap them. Use two sheets of heavy-duty foil around the ribs and add 1 cup of beef broth. Wrap tightly. If the bones are still poking through the foil, place the wrapped ribs in a small pan to catch any liquids and prevent them from escaping.
Continue Smoking:
Place the wrapped ribs back in the smoker at 300 degrees and let them continue cooking.
Perform the Probe Test:
After 2 hours, begin performing the probe test. If the ribs don't feel as tender. let them continue cooking. start checking for tenderness by gently poking the meat. Aim for an internal temperature of around 206 degrees Fahrenheit. However, the feel of tenderness is also an excellent indicator.
Rest the Ribs:
Remove the ribs from the smoker, wrap them in a clean beach towel, and allow them to rest on your counter for one hour.
Slice and Enjoy:
Slice the ribs and savor the deliciousness of your perfectly cooked Monster Beef Ribs.
Full Video- https://youtu.be/6IwYcLGV7Vo?si=7U1VP-V-RPioFE3T
Chicken Bombs

Ingredients:
1 pack of boneless, skinless chicken thighs
1 pack of cream cheese (room temperature)
2 whole fresh jalapeños
2 packs of budget-friendly bacon
1 cup shredded cheese
Optional: Favorite BBQ sauce for basting
Instructions:
Prepare the Grill or Smoker:
Set up your grill for indirect cooking or preheat your smoker to 300 degrees Fahrenheit (150 degrees Celsius).
Prepare the Jalapeños:
Grill or broil the jalapeños until they become slightly crispy or the skin chars a bit.
Prep the Chicken:
Remove the chicken thighs from the package and trim off any excess fat. Square up the chicken thighs.
Prepare the Cream Cheese Filling:
In a bowl, combine the room-temperature cream cheese, shredded cheese, and your favorite BBQ rub to taste. Mix the ingredients thoroughly.
Dice and Add Jalapeños:
Dice the grilled jalapeños and add them to your cream cheese mixture.
Fill the Chicken Thighs:
Place a scoop of the cream cheese mixture onto each chicken thigh.
Fold the chicken thigh to ensure the cream cheese is completely covered by the chicken.
Wrap in Bacon:
Wrap each chicken thigh with bacon, using about 2 slices per thigh. Mold the bacon around the chicken to ensure complete coverage.
Season the Chicken Bombs:
Season each chicken bomb with your favorite BBQ seasoning.
Smoke or Grill:
Place the chicken bombs on the smoker or grill and let them cook until the bacon is fully cooked, and the chicken reaches an internal temperature of 165 degrees Fahrenheit.
If you notice some cream cheese oozing from the center of the chicken, don't worry. This is normal. Continue cooking.
Optional BBQ Sauce Basting:
If the bacon is nearly done but not quite, you can start basting each chicken thigh with your favorite BBQ sauce.
Rest and Serve:
Remove the smoked chicken bombs from the smoker or grill and allow them to rest for 5 minutes before serving.
*Tip: If the bacon isn't fully cooked when the chicken reaches 165 degrees Fahrenheit, don't worry. Chicken thighs can be taken up to 204 degrees without drying out. Let them cook until the bacon is done
Full Video here- https://youtu.be/k5xSUvHf6Cg?si=3f51zGIqyFo1tj5t

ingredients
Spare Ribs
1 cup Your Favorite Teriyaki Sauce
Hot Honey Garlic Rub
2 tablespoons Mike's Hot Honey
Chopped Green Onion and Sesame Seeds for garnish
i cant believe its not butter spray butter
Directions:
Begin by preparing the spare ribs. To do this, remove the membrane from the back of the ribs for a more tender result.
Place the spare ribs in a large resealable bag or shallow dish. Pour 1 cup of your favorite teriyaki sauce over the ribs, ensuring they are well-coated. Seal the bag or cover the dish and let the ribs marinate in the teriyaki sauce for 4 hours in the refrigerator.
After the marinating time has elapsed, remove the ribs from the teriyaki sauce. Apply the Hot Honey Garlic Rub evenly to both sides of the ribs, ensuring a flavorful coating.
Allow the rub to sweat on the ribs while you prepare your smoker. Set the smoker's temperature to 300°F (150°C) to achieve a perfect cooking environment.
Place the prepared ribs in the smoker and let them cook for 2 hours. During this time, you can prepare to baste them with teriyaki sauce.
After the initial 2 hours, start basting the ribs with i cant believe its not butter every 45 minutes. Continue this process until the ribs reach an internal temperature of 206°F . This slow cooking process ensures tender, flavorful ribs.
Once the ribs reach the desired temperature, add 2 tablespoons of Mike's Hot Honey evenly over the ribs. Allow the ribs to continue cooking for an additional 15 minutes to let the flavors meld.
Remove the ribs from the grill and garnish them with chopped green onion and sesame seeds.
Serve your deliciously glazed teriyaki spare ribs, and savor every bite! Enjoy!

ingredients:
4 whole sweet potatoes
1 pack of affordable bacon
1/2 cup brown sugar
2 tablespoons of cinnamon (to taste)
Directions:
Begin by preparing the sweet potatoes. Wash and peel them if desired, then cut them into wedges.
Next, take your pack of bacon and start wrapping each sweet potato wedge with a slice of bacon. The savory, smoky flavor of the bacon pairs wonderfully with the sweetness of the potatoes.
In a small bowl, mix together the brown sugar and cinnamon. Adjust the cinnamon to your taste preferences, whether you prefer a hint or a bold burst of cinnamon flavor.
Once all the sweet potato wedges are wrapped in bacon, generously apply the brown sugar and cinnamon mixture to each bacon-wrapped wedge. This step adds a delightful sweetness and warmth to the dish.
Place the bacon-wrapped sweet potato wedges on a cooling rack. Now, you have two cooking options:
If you have a smoker, preheat it to 300 degrees Fahrenheit (150 degrees Celsius) and place the rack with your sweet potato creations inside. Let them cook in the smoky goodness for about an hour, or until the bacon is fully cooked and crispy.
Alternatively, if you're using an oven, preheat it to the same temperature (300 degrees Fahrenheit or 150 degrees Celsius) and place the sweet potato wedges on a baking sheet lined with a wire rack. Bake for about an hour or until the bacon is crispy.
Once your bacon-wrapped sweet potato wedges are cooked to perfection, remove them from the smoker or oven and allow them to cool for about 10 minutes. This helps the flavors settle and makes them easier to handle.
Finally, serve and enjoy this irresistible combination of sweet and savory flavors. These bacon-wrapped sweet potato wedges make a mouthwatering appetizer or side dish that's sure to impress your family and guests.
Bon appétit!

Ingredients:
3 bricks of cream cheese
3 of your favorite BBQ rubs (e.g., Green Chile Bacon Rub, Chipotle Mango Rub, and Arizona Cajun Rub)
1 jar of strawberry preserves (or your preferred fruit jelly)
Directions:
Begin by preheating your smoker or oven to 300 degrees Fahrenheit (150 degrees Celsius). This will be the perfect temperature to infuse your cream cheese with delicious smoky flavors.
Unwrap the bricks of cream cheese and lay them out on a clean surface. To create an appealing design, carefully cut slits in the cream cheese going in one direction about halfway through, and then make additional slits in the opposite direction. This technique will give your cream cheese a unique pattern after the smoking process.
Now, it's time to season the cream cheese bricks. Each brick should have its own distinct flavor, so generously apply one of your favorite BBQ rubs to each one. The combination of rubs will provide a delightful blend of smokiness and seasoning.
Place the seasoned cream cheese bricks in the smoker or oven and let them smoke for approximately 45 minutes. This time allows the cream cheese to absorb the smoky goodness and develop a creamy, smoky, and slightly spicy flavor.
After 45 minutes, carefully remove the smoked cream cheese from the smoker or oven and let it cool for a bit. You want it to be warm but not too hot to handle.
Now, take your jar of strawberry preserves or your preferred fruit jelly. Spoon a generous amount of the preserves on top of each cream cheese brick. The contrast of the sweet fruit preserves with the smoky cream cheese is simply divine.
To enjoy this savory and sweet treat, grab some crackers or chips as dippers. The combination of the creamy, smoky cream cheese and the fruity preserves will delight your taste buds with every bite.
Indulge in this delightful appetizer that perfectly balances the smokiness of BBQ rubs with the sweetness of fruit preserves. It's a crowd-pleaser for any occasion!
Full video here- https://youtu.be/jes8ihe1iRw?si=gaJwx6ohTPEcNNAu

Ingredients:
1 pack of chicken wings
1 cup of vegetable oil
Your favorite BBQ seasoning (Green Chile Bacon Rub)
Directions:
Start by preparing the chicken wings. Place them in a large bowl or a pan.
Drizzle the chicken wings with vegetable oil, ensuring they are evenly coated. This step helps the seasoning adhere to the wings and promotes a crispy texture during grilling.
Sprinkle your favorite BBQ seasoning generously over the wings. For a deliciously smoky and savory flavor, we recommend Green Chile Bacon Rub. Feel free to adjust the amount to suit your taste preferences.
Prepare your charcoal grill by lighting the charcoal and allowing it to heat up until it reaches a temperature of around 400 degrees Fahrenheit (200 degrees Celsius).
Once the grill is hot and ready, set up an indirect grilling zone. This means placing the chicken wings on the opposite side of the charcoal. This indirect cooking method ensures that the wings cook evenly without burning.
Carefully place the seasoned chicken wings on the grill's indirect side, spacing them out for even cooking. Close the grill's lid to capture that delicious smoky flavor.
Grill the wings until they reach an internal temperature of 180 degrees Fahrenheit (82 degrees Celsius) or higher. This ensures that the wings are cooked through and have a crispy exterior. Cooking times may vary, but it typically takes about 30-40 minutes.
Once the chicken wings have reached the desired temperature and have a lovely char, carefully remove them from the grill.
Allow the wings to cool for approximately 10 minutes. This resting period allows the juices to redistribute within the meat, ensuring they remain tender and flavorful.
Now, you're ready to enjoy these mouthwatering grilled chicken wings with the tantalizing taste of Green Chile Bacon Rub. Serve them up as a delightful appetizer or main course at your next barbecue or gathering.
Savor the smoky and savory goodness of these grilled chicken wings – a surefire hit at any outdoor gathering!
Full Video- https://youtu.be/_oYrj-vftUY?si=yftoVPRA_HZaYtCI

Ingredients:
2 Turkey Breasts
Your favorite seasoning (I used Your Behind BBQ Hot Honey Garlic Rub)
Black Pepper
2 sticks of butter
Directions:
Begin by removing the skin from the turkey breasts for a leaner result.
Season both sides of the turkey with a generous amount of Hot Honey Garlic Rub (or your preferred turkey seasoning) to infuse flavor.
Don't forget to add a sprinkle of black pepper to both sides of the turkey breasts for that extra kick.
Preheat your smoker to 300 degrees Fahrenheit (150 degrees Celsius).
Place the seasoned turkey breasts onto the smoker grates, allowing them to soak in the smoky goodness.
After about 45 minutes to an hour, ensure that the rub has formed a delicious crust on the turkey.
Carefully remove the turkey breasts from the smoker when they reach an internal temperature of 160 degrees Fahrenheit (71 degrees Celsius).
Take them off the grill and wrap each turkey breast separately in aluminum foil.
Inside each foil packet, add a stick of butter to enhance the juiciness and flavor.
Let the turkey rest for a well-deserved 15 minutes before slicing into it.
Finally, serve and enjoy your perfectly smoked and seasoned turkey breasts!
This revised version offers clear and concise instructions while maintaining all the essential details for a tasty turkey dish.
Full Video:
https://youtu.be/1XeO9AEukho?si=AZAve-ZI-h1jGjrZ

Ingredients:
Leftover Thanksgiving stuffing
Leftover turkey
1 package of cranberries
2 cups of canola oil
Waffle maker
Directions:
In a mixing bowl, combine your leftover stuffing, cranberries, and canola oil. Mix them together until well combined.
Preheat your waffle maker on the high setting.
Take a scoop of the stuffing mixture and place it onto the hot waffle iron. Cook until the stuffing becomes golden brown and crispy.
Carefully remove the crispy stuffing waffle from the waffle iron and let it cool for a moment.
Now, assemble your delicious leftover creation. Place slices of your leftover turkey on top of the stuffing waffle to create a satisfying sandwich.
It's time to savor the flavors of Thanksgiving all over again. Enjoy your unique and tasty leftover turkey and stuffing waffle sandwich!
This updated version maintains the simplicity of your recipe while providing clear instructions for creating a delightful sandwich using your Thanksgiving leftovers.
Full Video:
https://youtu.be/KrB4-mrwda4?si=joeWL_xvzsKjCE_j

Ingredients:
Whole pickles
1 block (8 oz) of cream cheese
1 pack of bacon
Your favorite BBQ seasoning (such as Green Chile Bacon Rub)
Instructions:
Begin by selecting fresh whole pickles. You can use dill pickles or any variety you prefer.
Cut each whole pickle in half lengthwise, creating two equal halves.
Using a spoon, carefully remove the inner seeds or "insides" of each pickle half to create a hollow cavity. Ensure not to puncture the pickle's outer skin.
In a mixing bowl, place the entire block of cream cheese.
Add your favorite BBQ seasoning to the cream cheese. If you're following our recommendation, the Green Chile Bacon Rub adds a fantastic smoky kick.
Mix the cream cheese and seasoning thoroughly until well combined. Adjust the seasoning amount to taste, depending on your desired level of flavor.
Fill each hollowed-out pickle half with the seasoned cream cheese mixture. You can use a small spoon or a piping bag for precision.
Now, it's time to wrap each stuffed pickle half with bacon. Use a strip of bacon for each pickle, securing it around the pickle and cream cheese. You can use toothpicks to hold the bacon in place if needed.
Preheat your grill or oven to 300 degrees Fahrenheit (150 degrees Celsius).
Carefully place each bacon-wrapped pickle onto the grill grates or on a baking sheet if using an oven.
Cook the bacon-wrapped pickles until the bacon is cooked to your desired level of crispiness. This typically takes around 20-25 minutes.
Once the bacon is done, remove the bacon-wrapped pickles from the grill or oven.
Allow them to cool for a few minutes, and then serve your delicious bacon-wrapped pickles as a tasty appetizer or snack.
Enjoy the perfect blend of smoky bacon, creamy cheese, and tangy pickles in every bite!
Watch full video here : https://youtu.be/j0XVZAmWSQs?si=eweme_LfxoQ86UsS

Ingredients:
1 package of chicken wings
Your favorite BBQ rub (we recommend Arizona Cajun)
Instructions:
Begin by taking the chicken wings out of the packaging and placing them on a clean surface.
Season the wings generously with your favorite BBQ rub, in this case, the flavorful Arizona Cajun blend. Make sure to coat all sides of the wings evenly, pressing the seasoning into the meat for maximum flavor.
Preheat your smoker to 300 degrees Fahrenheit (150 degrees Celsius) using your choice of wood chips or chunks for that smoky goodness.
Once your smoker is up to temperature, carefully place the seasoned chicken wings onto the smoker's grates. Ensure they are spread out to allow for even smoking.
Smoke the wings until they reach an internal temperature of 165 degrees Fahrenheit (74 degrees Celsius). This typically takes about 1.5 to 2 hours, depending on the size of the wings and your smoker.
Once the wings have reached the desired internal temperature, carefully remove them from the smoker and set them aside.
Now, it's time to get that perfect crispiness. Heat up oil in a deep fryer to 350 degrees Fahrenheit (175 degrees Celsius).
Carefully add the smoked wings to the hot oil, working in batches if necessary to avoid overcrowding the fryer. Fry the wings until they are golden brown and crispy. This should take about 3-5 minutes per batch.
Using a slotted spoon or tongs, remove the fried wings from the oil and place them on a plate lined with paper towels to drain any excess oil.
Allow the wings to cool slightly before serving.
Serve up your Smoke Fried Wings as a mouthwatering appetizer or main dish, and savor the perfect combination of smoky, seasoned flavor and crispy texture.
Enjoy your delicious, homemade Smoke Fried Wings with your favorite dipping sauces or sides!
Watch full video here: https://youtu.be/GQ7rUGHmL-c?si=Cd5OFVS7jwRAHX6-

Ingredients:
1 pack of chicken wings
1 pack of affordable bacon
Your favorite BBQ rub (we recommend Green Chile Bacon Rub)
Instructions:
Start by firing up your grill or smoker to a steady temperature of 300 degrees Fahrenheit (150 degrees Celsius). This will give your chicken wings that perfect smoky flavor.
Remove the chicken wings from their packaging and pat them dry with paper towels. This step helps the bacon adhere better to the wings.
Now, it's time to wrap each chicken wing with a slice of bacon. Take a slice of bacon and tightly wrap it around each wing, ensuring it's secure and covers the wing's surface evenly.
Once all the wings are neatly wrapped in bacon, it's time to season them. Generously sprinkle your favorite BBQ rub, the flavorful Green Chile Bacon Rub, over each bacon-wrapped wing. Make sure to coat them evenly for that delicious smoky kick.
Carefully place the seasoned bacon-wrapped wings onto the preheated grill or smoker grates. Arrange them so they have enough space between them for even cooking.
Let the wings cook on the grill or smoker until the bacon is fully cooked and has reached that desired crispy texture. This typically takes about 45 minutes to 1 hour, depending on your equipment and wing size.
Ensure the internal temperature of the chicken wings reaches 165 degrees Fahrenheit (74 degrees Celsius) or higher to guarantee they are safely cooked through.
Once your Bacon-Wrapped Chicken Wings are perfectly cooked and the bacon is crispy, remove them from the grill or smoker.
Allow the wings to cool for a few minutes before serving to avoid any burns.
Serve up these mouthwatering Bacon-Wrapped Chicken Wings as an appetizer or a delicious main dish, and savor the delightful combination of smoky bacon and tender chicken.
Enjoy your homemade bacon-wrapped wings with your favorite dipping sauces or sides for a memorable culinary experience!
Feel free to experiment with different BBQ rubs or glazes for a unique twist on the flavor profile, and don't forget to have some dipping sauces like honey mustard, ranch, or barbecue sauce on hand for added variety.
Watch full video here- https://youtu.be/Lrw4B8V0Fco?si=BS3B8Mx9hPe7USkr

Ingredients:
1 whole salmon
Teriyaki sauce
Green onions
Sesame seeds
Hot Honey Garlic Rub (or your preferred seasoning)
Instructions:
Begin by removing the whole salmon from its packaging and placing it on a clean cutting board.
Cut the salmon into large, evenly sized cubes, ensuring that each piece retains its skin. These will be the foundation of your flavorful salmon burnt ends.
Season the salmon cubes generously with your chosen seasoning, such as the zesty Hot Honey Garlic Rub. Make sure to coat each piece evenly, infusing them with rich flavors.
Prepare a large ziplock bag and place the seasoned salmon cubes inside.
Pour approximately half of the bottle of teriyaki sauce into the ziplock bag with the salmon. Seal the bag tightly and give it a good shake to ensure the salmon is well-coated with the teriyaki sauce.
Refrigerate the sealed bag with the salmon for up to 4 hours, allowing the flavors to meld and marinate.
Once the marinating time is up, remove the salmon from the refrigerator.
Preheat your smoker or oven to 300 degrees Fahrenheit (150 degrees Celsius).
Arrange the marinated salmon cubes on a wire rack, ensuring they are well-spaced to allow for even cooking.
Place the wire rack with the salmon cubes into the preheated smoker or oven.
Let the salmon cook until they reach your desired internal temperature. A recommended temperature is 135 degrees Fahrenheit (57 degrees Celsius), but you can adjust it to your preference for doneness.
Once the salmon cubes are perfectly cooked, carefully remove them from the heat source.
To enhance the flavor and presentation, drizzle additional teriyaki sauce from the bottle over each piece of salmon.
Sprinkle sesame seeds generously and garnish with finely chopped green onions for a delightful visual and taste contrast.
Serve your delicious Salmon Burnt Ends as a delectable appetizer or main dish, and enjoy the harmonious blend of savory, sweet, and smoky flavors!
Feel free to customize the marinating time and temperature according to your taste preferences, and don't forget to have extra teriyaki sauce on hand for dipping or drizzling if desired.
Watch full video here- https://youtu.be/VAL9YS4zTJ0?si=uBkPuQ-Q_N-kzVNo

Ingredients:
Chicken quarters
Your favorite chicken seasoning (we recommend Your Behind BBQ Arizona Cajun Rub)
Instructions:
Begin by preparing your chicken quarters. Trim any excess hanging meat if necessary, but for the most part, chicken quarters require minimal trimming.
Season the chicken quarters generously with your chosen seasoning, the flavorful Your Behind BBQ Arizona Cajun Rub. Make sure to coat all sides of the chicken pieces evenly, ensuring a burst of flavor in every bite.
Preheat your smoker to a steady temperature of 300 degrees Fahrenheit (150 degrees Celsius). This is the ideal temperature for achieving that perfect smoky flavor.
Once your smoker is ready, carefully place the seasoned chicken quarters onto the grates, ensuring they are well-spaced for even smoking.
Allow the chicken quarters to smoke for approximately one hour. It's essential to check the temperature during this time.
Chicken quarters have more fat and can be cooked to a higher temperature than other chicken cuts. Aim for an internal temperature of 190 degrees Fahrenheit (88 degrees Celsius) for juicy, tender results.
Once the chicken quarters reach your desired temperature, carefully remove them from the smoker.
Let the smoked chicken quarters rest for about 10 minutes. This resting period allows the juices to redistribute within the meat, ensuring maximum flavor and tenderness.
After the brief rest, it's time to enjoy your delicious smoked chicken quarters! Serve them as a delightful main course or pair them with your favorite sides for a complete and satisfying meal.
Savor the smoky, seasoned goodness of these chicken quarters, and impress your friends and family with your BBQ prowess!
Watch Full Video here- https://youtu.be/Uf-egAK2R4M?si=FPf3gVW__2SyUqjZ

Ingredients:
6 poblano peppers
Leftover pulled pork
3 packs of inexpensive bacon
Your favorite BBQ seasoning (we recommend Your Behind BBQ Green Chile Bacon Rub)
Instructions:
Begin by preparing the poblano peppers. Make a vertical incision at the top of each pepper, creating an opening large enough for a small spoon to fit inside. This opening will allow you to clean out the seeds and prepare the peppers for stuffing.
Using a spoon, carefully remove the seeds and clean the insides of the poblano peppers to create a hollow cavity for stuffing.
Next, prepare your peppers for stuffing by generously filling them with the flavorful leftover pulled pork. Pack the pulled pork inside the peppers, ensuring they are nicely stuffed.
With the peppers stuffed to perfection, it's time to wrap each one with thin strips of bacon. Wrap the bacon around each pepper, covering the entire surface. This bacon layer will add a delightful smoky and crispy exterior to your stuffed peppers.
Preheat your smoker to a steady temperature of 300 degrees Fahrenheit (150 degrees Celsius). This temperature will infuse your peppers with a rich smoky flavor.
Carefully place the bacon-wrapped stuffed poblano peppers onto the smoker grates, ensuring they are well-spaced for even cooking.
Allow the peppers to cook in the smoker until the bacon is fully cooked and reaches that desired crispy texture. This typically takes about 45 minutes to 1 hour, depending on your smoker and the thickness of the bacon.
Once the bacon is perfectly crisp and the peppers are cooked to perfection, remove them from the smoker.
Let the stuffed poblano peppers cool for a few minutes before serving to avoid any burns.
Serve up these mouthwatering Bacon-Wrapped Stuffed Poblano Peppers as a flavorful appetizer or main dish, and enjoy the delicious combination of smoky bacon, savory pulled pork, and the mild heat of poblano peppers!
This dish is sure to impress your family and friends at your next barbecue or gathering.
watch full video here- https://youtu.be/4-u7UDfxKnk?si=v5DhCCsf7n5xO4It

Ingredients:
For the Pork:
5-6 pounds of pork shoulder (also known as pork butt)
1/4 cup Your Behind BBQs Chipotle Mango Seasoning
1/4 cup brown sugar
2 tablespoons paprika
2 tablespoons kosher salt
1 tablespoon black pepper
1 tablespoon garlic powder
1 tablespoon onion powder
1 teaspoon cayenne pepper (adjust to your spice preference)
2-3 tablespoons vegetable oil
For the Smoking Process:
Charcoal or wood pellets (for your smoker)
Wood chips or chunks (hickory, apple, or cherry work well)
Aluminum foil
Spray bottle filled with apple juice or water
Instructions:
1. Prepare the Pork:
Start by trimming any excess fat from the pork shoulder, leaving about 1/4 inch of fat on the surface for flavor and moisture.
2. Make the Chipotle Mango Rub:
In a small bowl, combine Your Behind BBQs Chipotle Mango Seasoning, brown sugar, paprika, kosher salt, black pepper, garlic powder, onion powder, and cayenne pepper. Mix well to create your dry rub.
3. Apply the Dry Rub:
Drizzle the pork shoulder with vegetable oil, ensuring it's well-coated.
Generously sprinkle the chipotle mango dry rub over the entire surface of the pork, massaging it in to adhere.
4. Prepare the Smoker:
Preheat your smoker to a temperature of 225°F (107°C).
Add charcoal or wood pellets to your smoker and place wood chips or chunks on top. You can use a mix of charcoal and wood for a more authentic smoky flavor.
Place a drip pan filled with water or apple juice on the smoker's lower rack to help maintain moisture.
5. Smoke the Pork:
Once the smoker is at the desired temperature and producing a steady stream of smoke, place the seasoned pork shoulder on the smoker's grate.
Close the smoker's lid and let the pork smoke for several hours, typically 5-6 hours, or until the internal temperature of the meat reaches about 195-205°F (90-96°C). This slow and low cooking process will ensure tender and flavorful pulled pork.
6. Maintain the Smoke:
Throughout the smoking process, periodically add more wood chips or chunks to maintain a consistent level of smoke.
You can also spray the pork shoulder with apple juice or water every hour to keep it moist and enhance the flavor.
7. Rest and Pull:
Once the pork has reached the desired temperature, carefully remove it from the smoker and wrap it in aluminum foil.
Allow the wrapped pork to rest for at least 30 minutes to an hour. This resting period helps the juices redistribute within the meat.
8. Pull the Pork:
After resting, use two forks to shred the smoked pork. It should be incredibly tender and pull apart easily.
Remove any excess fat and discard it as you pull the pork.
9. Serve:
Serve the chipotle mango seasoned pulled pork on buns, tortillas, or with your favorite sides like coleslaw, pickles, or barbecue sauce.
Enjoy your flavorful and smoky pulled pork!
This chipotle mango seasoned pulled pork is sure to be a hit at your next barbecue or gathering. Adjust the spice level to your preference by adding more or less cayenne pepper to the dry rub. Enjoy!
Full Video- https://youtu.be/tBZktKLRiIc?si=-wBRBpVwJEivy1-s
Ingredients:
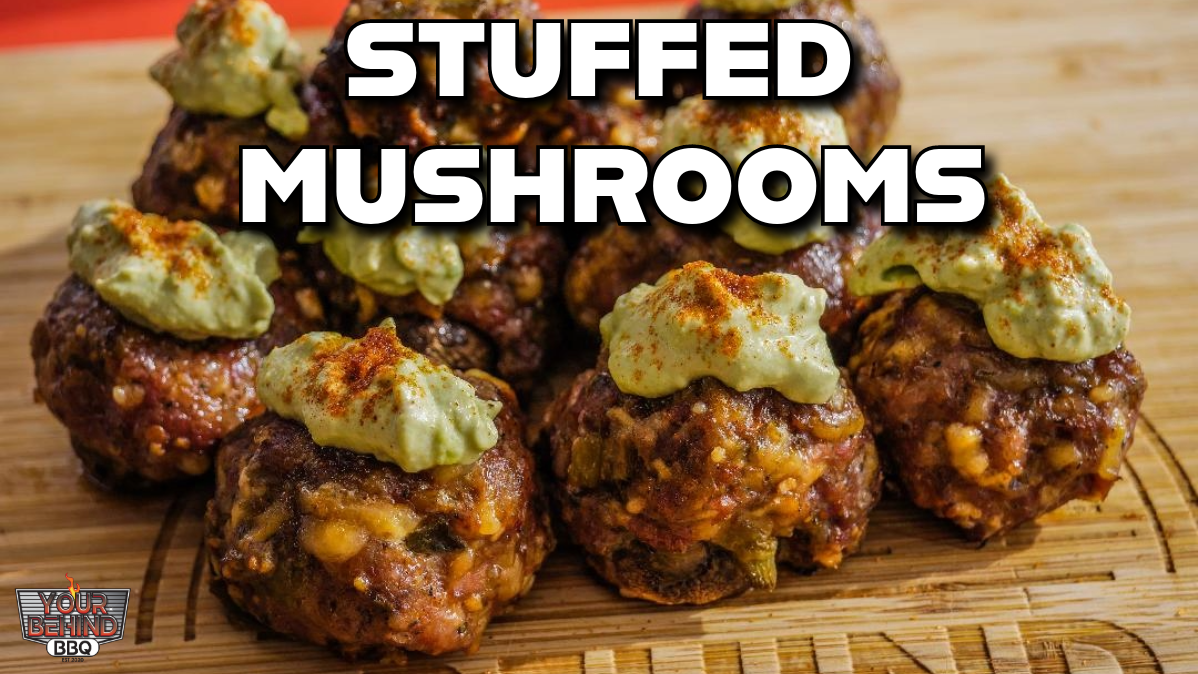
8 large poblano mushrooms
1 tube of hot Jimmy Dean sausage
1 can of green chilis
1 cup shredded cheese
Your Behind BBQ Green Chile Bacon Rub (to taste)
For the Creamy Chipotle Mango Sauce:
2 avocados
1/2 cup sour cream
1/2 cup Mexican crema (adjust to taste)
Your Behind BBQ Chipotle Mango Seasoning (about 1 tablespoon, or to taste)
Instructions:
Begin by preparing the mushrooms. Remove the stems and carefully hollow out a small space where the stems were to create a pocket for the stuffing. Slice off a thin portion of the back of each mushroom to ensure they lay flat on a cooling rack without wobbling.
In a mixing bowl, combine the hot Jimmy Dean sausage, green chilis, shredded cheese, and Your Behind BBQ Green Chile Bacon Rub to taste. Mix these ingredients thoroughly.
Stuff each mushroom cap generously with the sausage mixture.
Preheat your grill or oven to 300 degrees Fahrenheit (150 degrees Celsius).
Place the stuffed mushrooms on a grill rack or oven-safe tray and cook for approximately 45 minutes or until the mushrooms' internal temperature reaches 165 degrees Fahrenheit (74 degrees Celsius).
While the mushrooms are cooking, let's prepare the Creamy Chipotle Mango Sauce. In a separate bowl, mash the avocados. Then, add sour cream, Mexican crema, and Your Behind BBQ Chipotle Mango Seasoning to taste. Mix until the sauce reaches your desired consistency and flavor.
Once the sauce is ready, refrigerate it until the mushrooms have finished cooking.
When the mushrooms are done, remove them from the grill or oven and allow them to cool slightly.
Drizzle the Creamy Chipotle Mango Sauce over each stuffed mushroom.
Serve your BBQ Stuffed Mushrooms with Creamy Chipotle Mango Sauce and enjoy!
This revamped recipe provides clear instructions and adds a tasty twist with the creamy chipotle mango sauce. It's perfect for impressing your guests or indulging in a delicious snack.
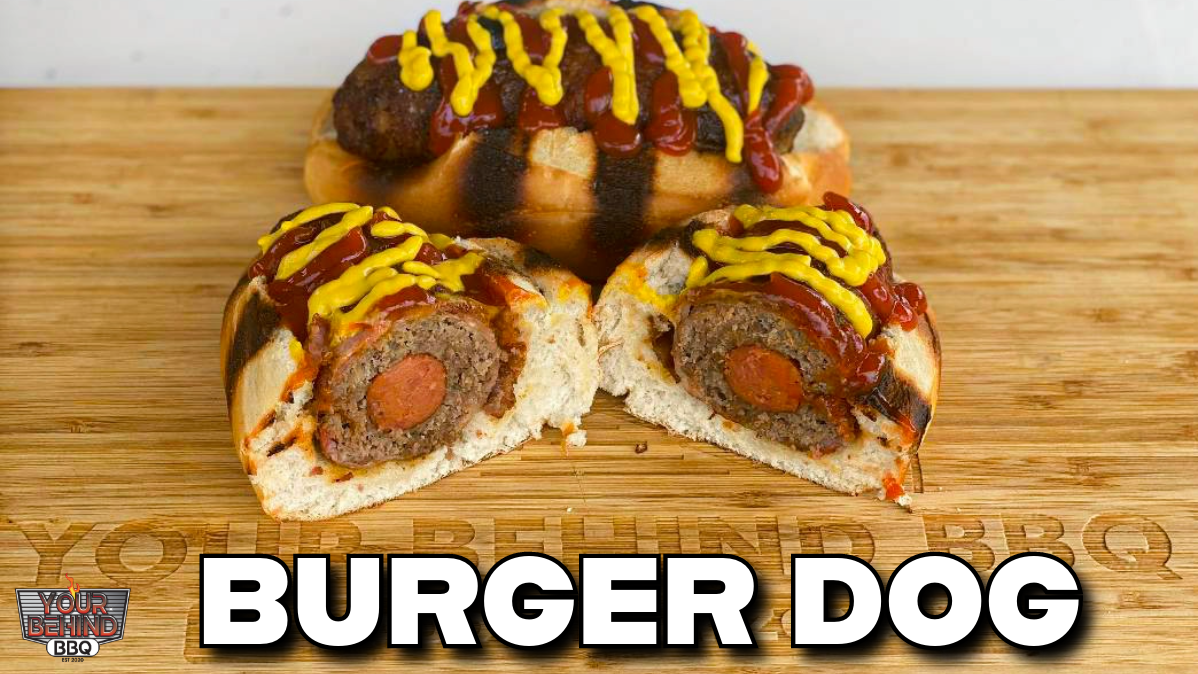
ngredients:
4 hot dogs
2 pounds of ground beef
3 packs of budget-friendly bacon (e.g., Bar-S)
Salt, pepper, and garlic (to taste)
Your Behind BBQ Green Chile Bacon Rub
Instructions:
Begin by seasoning the ground beef in a bowl. Add salt, pepper, garlic, and Your Behind BBQ Green Chile Bacon Rub to taste. Mix the seasonings into the ground beef thoroughly. Allow the seasoned beef to marinate in the refrigerator for at least 30 minutes.
While the ground beef is marinating, char the hot dogs. You can do this on the grill or in a pan. Once the hot dogs are cooked, set them aside to cool.
After the hot dogs have cooled down, take the seasoned ground beef and wrap it around each hot dog, forming a torpedo shape. Ensure that the ground beef covers the entire hot dog evenly.
Next, wrap each beef-covered hot dog with a strip of bacon until the entire beef portion is covered. This will add flavor and extra juiciness to your dish.
Now, season the outer layer of the bacon with Your Behind BBQ Green Chile Bacon Rub. This will infuse the bacon with a delightful smoky and spicy flavor.
Preheat your grill, smoker, or oven to 300 degrees Fahrenheit (150 degrees Celsius).
Place the bacon-wrapped beef dogs on the cooking surface and cook until the ground beef is fully cooked and the bacon is crispy. This will take about 20-30 minutes.
Once cooked, you can serve these mouthwatering Bacon-Wrapped Beef Dogs right off the grill, or you can take it up a notch by placing them in buns and adding your favorite burger or hot dog toppings.
Enjoy your delicious creation with the perfect blend of smoky bacon, seasoned ground beef, and the zesty kick of the Green Chile Bacon Rub!
This revamped recipe offers clear instructions and an extra kick of flavor with the Green Chile Bacon Rub. It's a savory delight for any BBQ enthusiast.
Full Video - https://youtu.be/3ICgxKIOQ2I?si=3nD5G6XFGgTgNqBC

Smoked Cajun Chicken Wings with Sweet and Spicy Sauce
Ingredients:
24 chicken wings
1/3 cup of Your Behind BBQ Arizona Cajun Rub
1 stick of unsalted butter
Juice from 1/2 lime
2 tablespoons of minced garlic
1/3 cup of Loot And Booty Cherry BBQ Sauce
1/3 cup of Frank's Red Hot Sauce
1/3 cup of hot honey
Instructions:
1. Prepare the Marinade: In a mixing bowl, combine the Your Behind BBQ Arizona Cajun Rub, unsalted butter, lime juice, minced garlic, Loot And Booty Cherry BBQ Sauce, Frank's Red Hot Sauce, and hot honey. Mix well until all ingredients are thoroughly combined.
2. Marinate the Chicken Wings: Place the chicken wings in a large ziplock bag and pour the prepared marinade over them. Seal the bag, ensuring that the wings are evenly coated with the marinade. Refrigerate and marinate for at least 4 hours, allowing the flavors to infuse.
3. Preheat the Grill: Preheat your grill to 300 degrees Fahrenheit (150 degrees Celsius) for indirect grilling/smoking. If using wood chips, soak them in water for added smokiness.
4. Smoke the Wings: Arrange the marinated chicken wings on the grill grates, away from the direct heat source. If using wood chips, sprinkle them over the hot coals or place them in a smoker box. Close the grill lid.
5. Smoke to Perfection: Smoke the wings until their internal temperature reaches over 200 degrees Fahrenheit (93 degrees Celsius). This will result in tender, flavorful wings with a perfect smoky finish. The cooking time may vary, but it typically takes around 1.5 to 2 hours.
6. Prepare the Sauce: While the wings are smoking, prepare the sauce using the same ingredients and measurements as the marinade. Mix well in a separate bowl.
7. Sauce and Serve: Once the wings are smoked to perfection, remove them from the grill. In a large mixing bowl, toss the smoked wings with the prepared sauce until they are well coated.
8. Enjoy: Serve your smoked Cajun chicken wings with the sweet and spicy sauce. They're ready to enjoy as a delicious appetizer or main dish.
These flavorful smoked chicken wings are sure to be a hit at your next barbecue or gathering!

Prep Time: 15 minutes | Cook Time: 1 hour | Serves: 4
Ingredients:
4 boneless, skinless chicken breasts
1 block (8 oz) cream cheese, softened
1/3 cup dried crispy onions
1/3 cup sliced pepperoncini peppers, drained
1/3 cup shredded yellow cheese (your choice)
Your Behind BBQ Green Chile Bacon Rub
Your Behind BBQ Chipotle Mango Rub (or your favorite chicken seasoning)
8-12 slices of thin bacon (as needed)
Instructions:
Prepare the Chicken:
Remove the chicken breasts from the packaging and trim off any unwanted fat or hanging meat.
Lay each chicken breast flat and make a lengthwise slit down the top, creating a pocket. Be careful not to cut all the way through.
Prepare the Cream Cheese Mixture:
In a mixing bowl, combine the softened cream cheese, crispy onions, sliced pepperoncini peppers, and shredded yellow cheese.
Season the mixture with Your Behind BBQ Green Chile Bacon Rub and Your Behind BBQ Chipotle Mango Rub (or your preferred chicken seasoning). Adjust the seasoning to your taste.
Stuff the Chicken:
Carefully spoon the cream cheese mixture into each chicken breast pocket, ensuring they are evenly filled.
Wrap in Bacon (Optional):
For an extra layer of flavor, wrap each chicken breast with 2-3 slices of thin bacon, securing the ends with toothpicks.
Season the outside of the bacon-wrapped chicken with additional Your Behind BBQ rubs or your preferred seasoning.
Cooking Options:
You can choose to cook your stuffed chicken in the oven, smoker, or on the grill. Regardless of your method, preheat to 275°F (135°C).
Cooking Instructions:
Place the chicken directly on the cooking grate or on a wire rack in the preheated cooking appliance.
Cook until the chicken reaches an internal temperature of 160°F (71°C). This typically takes about 1 hour, but cooking times may vary depending on your chosen method and equipment.
Rest and Serve:
Once the chicken reaches the desired temperature, remove it from the heat source.
Allow the chicken to rest for about 10 minutes. This helps the juices redistribute and ensures a tender, juicy result.
Enjoy:
Serve your Cream Cheese Stuffed Bacon-Wrapped Chicken as a delicious main dish alongside your favorite sides. Enjoy the savory, cheesy, and slightly spicy flavors!
Feel free to customize this recipe with Your Behind BBQ rubs or your preferred seasonings to suit your taste buds. Bon appétit!
Full video here- https://youtu.be/zz2pfiXqV3s?si=Odvm4k6yI5tVbbfQ

Ingredients:
1 brick (8 ounces) of cream cheese
1 cup shredded cheese (your choice)
1/2 cup crispy onions
2 tablespoons or to taste of green chile bacon rub
1 pack of thin bacon slices
1 package of 6 bratwurst sausages
Instructions:
Preheat your smoker to 300°F (150°C).
In a mixing bowl, combine the cream cheese, shredded cheese, crispy onions, and green chile bacon rub. Mix until all the ingredients are well incorporated.
Make a lengthwise slit on the top of each bratwurst sausage to create a "boat" for the filling.
Spoon the cream cheese mixture into each sausage boat, ensuring they are generously filled.
Wrap each stuffed sausage with thin bacon slices, securing the bacon in place with toothpicks if necessary.
Place the bacon-wrapped sausage boats on the smoker rack.
Smoke the Sausage Boat Poppers at 300°F (150°C) for approximately 45 minutes, or until the bacon is crispy and the sausages reach your desired internal temperature.
Be sure to check the internal temperature of the sausages using a meat thermometer; they should reach at least 160°F (71°C) for safety.
Once cooked, remove the Sausage Boat Poppers from the smoker.
Allow them to cool slightly before serving.
These Sausage Boat Poppers are a delicious and smoky treat that's perfect for any gathering or barbecue. Enjoy!

Ingredients:
8 beef short ribs
Your favorite BBQ beef seasoning or homemade SPG seasoning (1 tablespoon salt, 1 tablespoon pepper, 1 tablespoon garlic)
1 bottle of "I Can't Believe It's Not Butter"
Optional: Wood chips for smoking (e.g., hickory, applewood)
Instructions:
Preheat your smoker to 300 degrees Fahrenheit.
Trim and remove some of the hard fat on top of the beef ribs, but do not remove the membrane from the back of the ribs.
In a small bowl, mix together your homemade SPG seasoning or your favorite BBQ beef seasoning.
Spray each rib generously with "I Can't Believe It's Not Butter" to coat.
Apply the seasoning mixture thickly and evenly onto each rib, ensuring full coverage.
Once the smoker is preheated, place the seasoned ribs directly onto the smoker grates.
Let the ribs smoke for approximately 1 hour.
After the first hour, begin spraying each rib with "I Can't Believe It's Not Butter" every 30 minutes for an additional hour.
Monitor the temperature of the ribs using a meat thermometer. Once they reach an internal temperature of over 205 degrees Fahrenheit and feel tender to the touch, they are done.
Carefully remove the ribs from the smoker and allow them to rest for a few minutes before serving.
Serve and enjoy your tender and flavorful smoked beef short ribs!
Full video-
https://youtu.be/lBQ_C219z1A?si=GjuWAcdDI_powhGn

The Real McRib
Ingredients:
1 rack of baby back ribs
Your Behind BBQ Chipotle Mango Rub
Your Behind BBQ Arizona Cajun Rub
BBQ sauce
Sliced onions
Sliced pickles
1 loaf of French bread
Instructions:
Preheat your grill to 300 degrees Fahrenheit.
Remove the ribs from the package and carefully remove the membrane and any excess hanging meat from the rack.
Season both sides of the rack generously with the Chipotle Mango and Arizona Cajun rubs. Allow the ribs to sit for 20 minutes to allow the rub to penetrate the meat.
Place the seasoned ribs on the grill, meat side up, away from the direct heat source. Close the lid and smoke for one hour.
After one hour, flip the ribs over so that the meat side is facing down towards the heat source. Continue smoking for another hour.
Remove the ribs from the grill and place them on a sheet of aluminum foil. Add a stick of butter to the foil, then wrap the ribs tightly. Return the wrapped ribs to the grill for an additional 45 minutes.
After 45 minutes, carefully remove the ribs from the grill and unwrap them. Slowly remove each bone from the rack while keeping the meat intact.
Once the rib bones are removed, brush the ribs generously with your favorite BBQ sauce.
Place the sauced ribs back on the grill for 20 minutes to allow the sauce to set.
While the ribs are finishing on the grill, toast slices of French bread to your desired level of crispiness.
Remove the ribs from the grill and begin assembling your sandwich. Layer the rib meat on the toasted French bread slices, topping with sliced onions and pickles.
Serve immediately and enjoy your homemade Real McRib sandwich!